Sunday, October 20, 2013

let them eat brioche!

That's what Marie Antoinette actually said.  Brioche, that egg-n-butter enriched bread that apparently mistranslates to cake somewhere crossing the Channel.

A post by those awesome bread bakers over at Artisan Bread in Five Minutes A Day hit my feed with a recipe I could not resist.  Pumpkin Swirl Bread.  So, friends, here goes.  What you are about to see is not pretty.  But it was darn near polished off by 4 people in 24 hours.  There is a bare heel left for me for tomorrow with my tea!


I started off with the Whole Wheat Brioche from Healthy Bread in Five Minutes A Day.  This required some forethought on my account because the enriched dough needs to be refrigerated for 2 hours minimum.  I went with overnight.  And while we are talking about my deviations, I also used two egg beater servings (1/4 cup each) in place of two of the eggs and canola oil instead of butter.  The dough seems none the worse for it.  At any rate, whatever brioche you use, you will need 1 1/2 lbs of it.
Filling!  1/2 cup pumpkin puree,  1/4 cup brown sugar, and 1 1/2  tsp pumpkin pie spice.

Take your pound and a half and roll it out to a rectangle, 1/4 inch thick.  Yes, I got a ruler.  Yes, that's as rectangular as I'm gonna get rolling out bread dough!
Spread filling and roll it up tight and pinch the seam to seal it up.  This is messy, folks.  You will be licking spiced and sugared pumpkin puree off your fingers when you are done (she says this like it's a bad thing!)
So far so good, right?  Here's where it all really starts to fall apart!

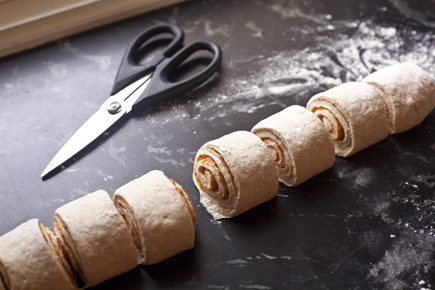
You know those cute photos of easy-to-make, pretty things on Pinterest?  Yeah.  Cut your jelly roll of brioche dough and pumpkin mess into ten equal pieces.  Somehow, this looks a lot less like their photo and a lot more like something that flew through the air and stuck to a Spock in Star Trek episode 29, Operation:  Annihilate!  ::ahem::
Nonetheless, I trudged on, placing six pieces facing outwards along the sides of the pan and the remaining four on top.  The hope was that they would rise to the challenge and glue themselves together.
After ninety minutes...
And after 50 minutes in a 350F oven!
So, while nowhere near as pretty as the nice people who make a living doing it, the Pumpkin Swirl Brioche was every bit as tasty as I hoped!  And its adorable, cinnamon roll meets bread pan look gives me ideas for other things!  And as for looks, I have this sneaking suspicion that somewhere between rolling the dough up and cutting it into ten parts, there was some refrigeration time to firm the whole thing back up.  I may try that on my own next time.

If you make this, please include photos in your comments!

Monday, May 6, 2013

ham it up

Deviled Ham might be the witch's cauldron of pasty meats, but as it is my first foray into the genre, I may find they are all like this!  Faced with a significant chunk of leftover spiral ham and a sudden desire for this odd spread most people only eat on a dare, I scoured the internet for recipes.  After the first half dozen, I realized it comes down to this:

about 2 cups of diced ham
a scant quarter cup of mayo
a healthy squeeze of mustard
a few spoonfuls of something pickled
a quarter of an onion, coursely chopped
1/2 tsp paprika
a few dashes of hot sauce
a pinch of cayenne
salt, pepper to taste

Optional items range from maple syrup to horseradish and include Worcestershire Sauce, white vinegar, chopped bell pepper, caraway seeds, coriander seed, mustard powder in addition to prepared mustard, smoked paprika, unsalted butter in lieu of mayonnaise...as you can see, an eye of newt would not be out of the question in this recipe!

I opted to use real mayonnaise over Miracle Whip, dijon mustard (you can see how varying the mustards would significantly change the taste), capers for my pickle (other options were dill, bread and butter, and sweet relish, so sky's the limit here) and red onion (shallots?  white onion?  vidalias?  leaks???).  I also added  some smoked hot paprika.

Experiment and share!


For days, I couldn't walk by the refrigerator without grabbing a bit on a cracker!


sweet surprise

When Marissa McClellan of Food in Jars fame says something is good, I tend to believe her.  I do have to admit that I looked at her Canteloupe Jam with Vanilla with a raised eyebrow so that, and the fact that I had a melon in the refrigerator that was harder than anyone in my family wanted to eat, meant it had to be tried.   A quick glance in the Narnia I call my pantry turned up a vanilla bean and I was off!

I am hotlinking the recipe to an online newspaper article about her fabulous book, which I really suggest you either buy.  At least check it out of the library for a test run!  I know hot linking is typically frowned upon but in this case, the newspaper has permission from Ms McClellan to publish her recipe and I do not, so in the interests of getting you to the recipe legally, there it is.  And it is not widely available in multiple forms over the internet so...

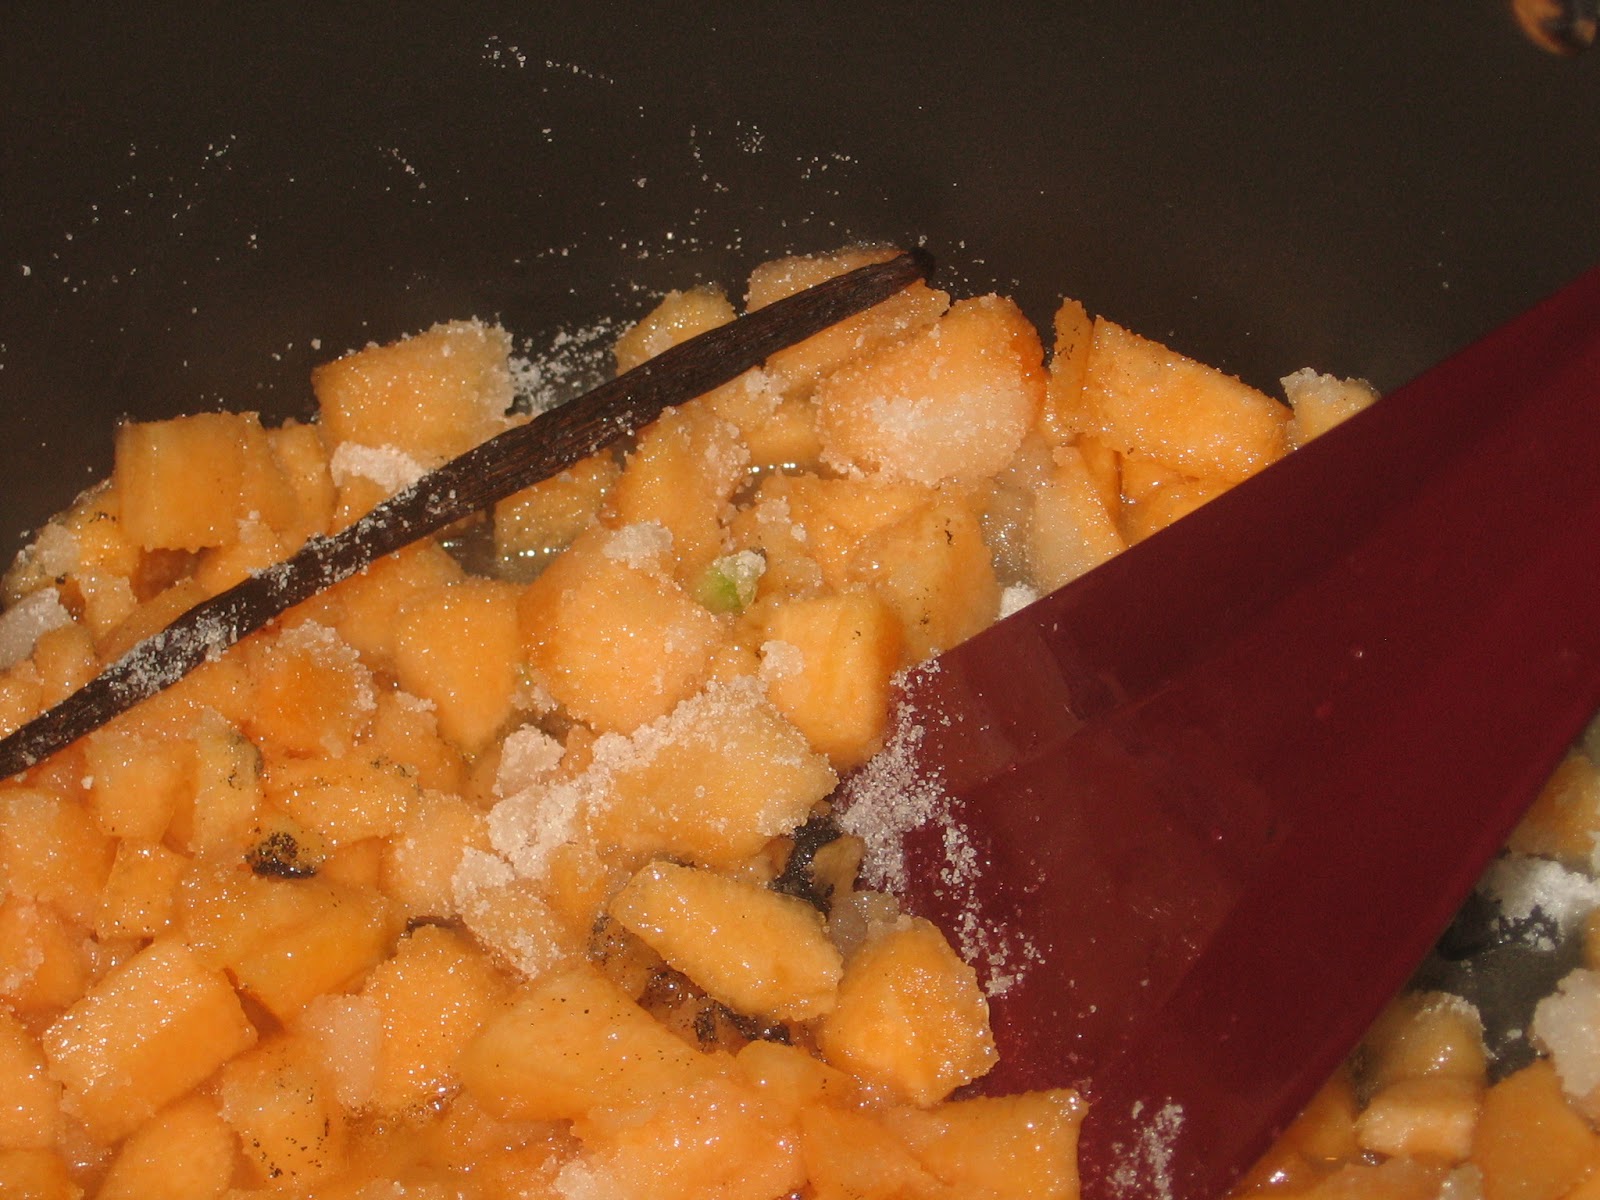
Seeded and chopped, I dumped the melon into my biggest stock pot - it never pays to have hot sugar glomming up the top of your stove and spraying onto your arms - with sugar, vanilla bean scrapings, and the pod itself and cooked it as directed for 8 to 10 minutes.   

All went swimmingly well and when it says "until the bubbles look thick"...well, they really did, so that is a valuable marker.  I used exactly 2 1/2 cups of melon and somehow ended up with two 8oz jars instead of three, but they taste like a really sophisticated childhood sweet.  Definitely one to make again.


all the usual suspects in the pot


the delightful outcome

Tuesday, February 26, 2013

One, Two, Three!

Limoncello...it's as easy as

5 Meyer Lemons plus one orange

Rind peeled & pithed off, citrus juiced, 3/4 cup simple syrup

Plus 3 cups of vodka
and voila!  Limoncello!  Wait several weeks, add more simple syrup to taste, enjoy!

Thursday, February 7, 2013

Pucker Up, Sunshine!

It's kumquat season!  You know, that tiny little fruit you pop in your mouth for a burst of sweet and sour and seed spitting?  Yum!

I picked up a couple of pints at the store this week and after trying them out on my unsuspecting sons (they loved them), trawled the internetz for ways to preserve these little beauties.  Apparently, you can pickle anything!

I borrowed this recipe from vanillagarlic, making my own modifications because really?  Who has cardamom pods in their pantry without prior planning.  I promise, I have a ridiculous spice cabinet.  Especially for someone who moves as often as we do.  But I will have to add the pods.  Apparently, 10 pods equals about a teaspoon of ground cardomom, so we're good.  If you need pods, or even cardomom, I highly recommend the wonderful folks at Savory Spice Shop, based in Colorado with franchises popping up all over the place.  But I digress.

finished product


Pickled Kumquats
(2 pint jars of pickle)

2 pints of kumquats, (about 4 cups), halved with seeds popped out as you can reach them.
1 tsp kosher salt
3 cups white vinegar
1 cup sugar
4 cardamom pods (or about 1/4 tsp ground cardamom)
5 whole cloves
6 black peppercorns
1 tsp ground ginger
1 cinnamon stick, broken in half

Sterilize two pint size canning jars in a small-batch canning pot full of boiling water, place your lids in another small pot with a few ladles of the boiling canning water to soften the seals, arrange your canning equipment for easy access (funnel, towel, little magnetic stick thingie to pick up the lids from the hot water, rings, jar grabber, damp paper towel to wipe the jar before placing the lid, timer, ladle).

After prepping your kumquats, a surprisingly easy task, place them in a 4 quart saucepan, cover with water, add salt, and bring to a boil.  Cover and simmer for 5 minutes while you get your spices together.  Drain and set aside.

Add the vinegar, sugar, and spices to the pan and bring the mixture to a boil.  Add the kumquats back to the pan and simmer for one minute.

Ladle the kumquats into sterilized jars.  Be sure the fruit is fully immersed in the liquid, leaving 1/2 inch head space.  Lid, ring, and process for 10 minutes in the canner.  Remove the canner from the heat and take off the lid of the pot for about 5 minutes, then remove the jars from the canner.

Any extras that did not fit in your two pint jars should be cool enough to eat now!  Warning:  Don't breath in with the pickling liquid in your mouth.  You will cough!

Thursday, November 15, 2012

no muppets were involved in this jam session

Kiwi Jam
Sometimes plain and simple can yield the most amazing results.  Take this kiwi jam, for example.  My youngest, a lover of kiwi and all things sweet, had been asking me for a preserve made of this favored fruit.  Our local warehouse store was conveniently selling big plastic breathable boxes of kiwis so after putting them in school lunches for a week, I peeled and chopped the remaining just as they were reaching that too-soft stage.  Then I opened up my trusty Ball Blue Book of Preserving.

Set up a giant stockpot or water bath canner pot of water.  I use my Ball Home Canning Discovery Kit, which is perfectly sized for small batch canning and fits into an 8 or 12 quart stockpot.  Bring the water to a boil and know where the rest of your equipment is located in your kitchen.

Kiwi Jam

3 cups of chopped and peeled kiwi fruit
1 package powdered pectin
1 cup unsweetened pineapple juice
4 cups of sugar

Mix the kiwi, powdered pectin, and pineapple juice in a large saucepan.  Don't skimp on the size of the saucepan unless you enjoy burnt sugared fruit laminated to your stove top!  Bring the mixture to a boil, stirring constantly.  (Pause for laughter)

Um, ok.  So really, at this point, keep an eye on that mess in the pot while you drop your 4 plus an extra half-pint jars into the boiling water.  Scoop out a few ladles of hot water into a sauce pan, set it to the lowest temperature on your stove, and drop in your lids to soften.

Once you have a boil going in your fruit mixture, add the sugar all at once and stir until it is dissolved.  There will be a quiet moment before boiling picks up again and when it does, you do actually need to be there with your long-handled rubber spatula.  Bring it to a rolling boil.  Rolling boil means a boil you cannot stir down, the kind that is making the mixture creep up the sides despite your frantic stirring, threatening to spill over the pan.  It will randomly blurp hot sugared fruit mixture at your unprotected hands.  Big pot and long-handled spatula?  You will thank me later!

Boil hard for one minute, more if you are at altitude.  Take it off the heat and skim any foam that may have accumulated.  Those jars you had boiling?  Take a moment to fish those out onto a towel set up next to the pan of kiwi jam.  Ladle the jam into the jars, using the canning funnel and leaving a 1/4-inch headspace.  Wipe down the edges with a clean towel or moistened paper towel to ensure there is nothing between jar and lid to interfere with the sealing process.  Adjust the two piece cap, which means this:  place that softened lid onto the cleaned jar and secure the ring to finger-tight.  Do not crank down on that ring, it's just not necessary.

Process for 10 minutes in a boiling water canner with at least an inch or more of water above the jars, two inches is better.  Keep some water boiling on the stove to add, if necessary.  Start your timer when the canner water begins to boil, not when you place the jars in the canner.  Put the lid on the canner to keep the water boiling.

When the timer goes off, remove the lid from the canner, take the canner from the stove, and set a 5 minute timer.  Remove the jars to a towel on the counter and try to leave them alone at least until they cool!  Eat the now cooled jam that you ladled into the spare jar, you know, the one that didn't fill enough to put in the canner.  Enjoy!

Thursday, November 1, 2012

the never-ending gift or With Friends Like These...

Amish Friendship Bread.  It all sounds so nice as your friend slips you a bag of goo and an over-copied sheet of instructions.  "Make sure you get some instant pudding when you shop this week," she says urgently.  You begin to notice the shifty wild eyes as she looks around for her next victim.  She has three more Ziploc bags in her purse.


So here's the truth about AFB, the little secret no one tells you.  It's a sweet sourdough starter.  And...no Amish were involved.  You can actually make your own.  After all, someone has to start the cycle!

Original Starter for Amish Friendship Bread (aka Sweet Sourdough Starter)

1 cup flour
1 cup sugar
1 cup milk (seeing a trend here?)
1 pkg of active dry yeast
1/4 cup 100F water

Bloom the yeast in the water for 10 minutes in a non-reactive bowl (Glass and ceramic are preferred, stainless steel is verboten), stir in other ingredients, cover and rest in a cool corner of the kitchen.  Glance at it when you remember and give it a stir if you see a watery substance on top.

On day 7 add:

1 cup milk
1 cup flour
1 cup sugar

Stir, cover, rest.

On day 14 add:

1 cup milk
1 cup flour
1 cup sugar

What I have done in a bowl can be done in a well-sealed Ziploc plastic bag.  This is especially fun for small children and should be left in an area of the kitchen they will see and remember to "squish it every day."  Also, the 7 days between adding additional ingredients is not firm.  So long as there are 5 days between, you are fine.  Wing it!  Also, you can reduce the whole white flour extravaganza by using whole wheat or white whole wheat for some of those 1 cup flour add-ins.

After you have run through the initial process, whatever is left of your starter can be kept alive by adding smaller amounts of the feeder ingredients - ie 1/4 cup each milk, sugar, flour - to create the quantity of starter you intend to use. You can also hold the starter in stasis in the refrigerator.  Just be sure to refresh it on the day of use by adding the feeder ingredients.  You can also revisit this starter by freezing a portion of it and feeding it (building it up) after it has been defrosted.


So, now what do you do?  Well, that depends on your friends LOL.  You can put a hefty cup of starter into Ziploc bags and send it on its merry way with a sheet of instructions you can find anywhere on the internet by Googling "Amish Friendship Bread," or you can simply fish out the starter as needed and cook it up yourself.  The online recipes will include that aforementioned box of pudding.  Feel free to find and use that yourself as it is easily located.  I prefer to use the starter to make quick breads, waffles, pancakes and cakes like the following!

Pumpkin Bread

1 cup starter
1/3 cup flavorless oil like canola
3 eggs
1/2 tsp salt
1 tsp vanilla
1 tsp cinnamon
1 tsp pumpkin spice
1 cup brown sugar
1 cup all-purpose flour
1 cup white whole wheat flour
1 1/4 tsp baking powder
1/2 tsp baking soda
1 cup of canned pumpkin (not pumpkin pie filling) or cooked and mashed fresh pumpkin
1 cup raisins or other dried fruit (optional)
1 cup chopped walnuts or pecans (optional)

Grease and sugar (not flour) your baking pan(s).  Fill 2/3 full of batter.  Bake in 325F oven 45 to 90 minutes depending on the size pan you are using.  Mini-loaf pans - check after 30 minutes (four loaves), full size pans could be as long as an hour and a half (1 loaf).

mmmmm, pumpkin bread!